Congratulations on deciding to start with your journey in creating your own self-hosted blog!
In this part of the guide we will set up our first AWS account, create some necessary resources, and then set up the server on which we will host our brand new blog!
Creating your AWS account
To get started, navigate to aws.amazon.com. Click the big Create an AWS account button at the top right of the screen, and go through the process of creating your account.
In this process, you will need to provide your credit card details. However, don't worry about this, you have access to the Free Tier for 1 year. Everything we do in this guide will make use of the free tier, meaning you won't incur any charges for the first year that your account exists.
Do keep in mind that after one year, you will begin to incur charges. While these charges will be small, (mine are no more than £8 a month for this blog), AWS will automatically bill you. So remember to be prepared for this, or cancel your account before this happens!
A Brief Introduction to AWS
Before we go poking around AWS, let's first have a small conversation about what AWS actually is, and how it will help you!
AWS offers a user-friendly and flexible cloud computing environment. As a user, you can leverage AWS services like Amazon EC2 for virtual server instances, Amazon S3 for scalable and cost-effective storage, and AWS Lambda for serverless computing
Cloud computing refers to the delivery of computing services, including servers, storage, databases, networking, software, analytics, and intelligence, over the internet. This means everything will be hosted on AWS servers, without the need to provide your own computing power, saving on energy costs and keeping everything centralised and accessible.
Most importantly, this removes the need to host websites on your personal device, taking advantage of the security and networking benefits offered by AWS to making safer to host your own websites and applications.
Long story short, using AWS to host a website or server is both easier and safer than hosting it in your own home!
An introduction to Amazon EC2
Now that we're set up with an AWS account, and have an understanding of what it can provide for us, it's time for the most exciting part. Let's create the server instance where our blog will be hosted!
First, navigate to console.aws.amazon.com, and find the search bar in the top left hand of the screen. Perform a search for EC2 and select the first option.

EC2, or Elastic Cloud Compute, is a core AWS service that provides us with virtual servers, otherwise known as instances. These instances offer a variety of configurations, including different instance types, operating systems, and storage options.
However, the most appealing part of an EC2 instance, is that it quickly scales its computing capacity up and down to meet the current demand. This means a paying user will only pay for the resources actually used.
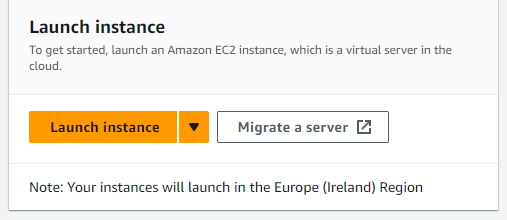
Now that we are on the EC2 resources page, you can find a big yellow button saying Launch instance. Go ahead and click that, and we'll get started!

Launching our first EC2 instance
Initially, the EC2 instance launching page may seem intimidating. However we will take it one step at a time and you will quickly see that it is all simple enough!
Names and Tags
First, we need to choose a name for the EC2 instance. I'm going to call it My Grav Blog but you can name it anything you'd like!
Application and OS images
Next we need to choose either an OS image or an Amazon Machine Image. AMI's can be incredibly useful, by providing a pre-created server image to suit many needs and purposes. We will be creating an Ubuntu EC2 instance using an AMI on the Free Tier.
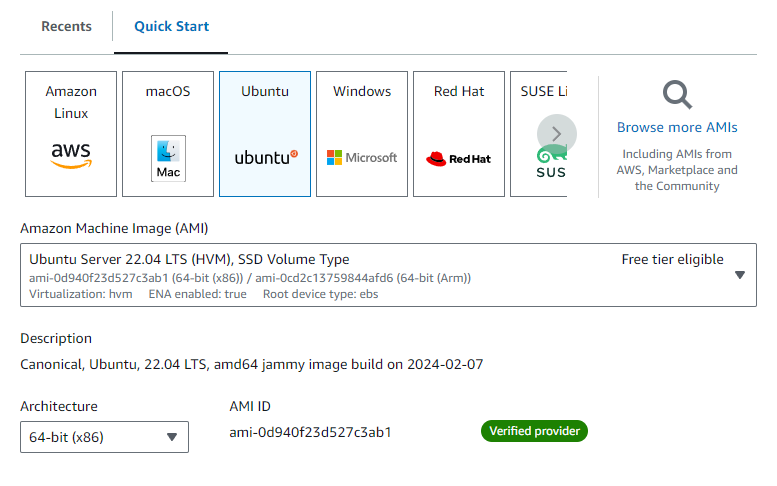
From the Quick Start tab, select Ubuntu. Below this section you'll find the AMI dropdown. Select the most recent LTS version that is eligible for the free tier. In my case, I will be using Ubuntu Server 22.04 LTS (HVM) on the Free Tier.
This name refers to Ubuntu Server, the operating system that the instance runs on. 22.04 LTS, meaning we are on version 22.04 and has Long-term support (LTS), meaning it is a stable release that will be maintained for a longer period of time.
Keeping everything else default, the AMI section will look a little something like this.

Instance type
Moving on, we now need to choose the type of instance we will be using. To put it simply, we will be deciding how much computing power is needed and how much we are willing to pay for an instance. As before, we will be using a free tier instance, called t2.micro.
A t2.micro instance will be more than enough for our purposes, and will very easily support a low-mid traffic blog like the one we plan to make.
Key pair (login)
On this next step we will be creating a Key Pair. A key pair is essential when you would like to securely access your instance. It consists of a public key, used to encrypt information, and a private key that is kept secret and used to decrypt information. You don't need to worry about the details too much, all you need to know is that this will generate a file that is very important to keep safe.
First, choose a name for your keypair. I will be calling mine Grav CMS Keypair, but again this name is arbitrary. Just ensure it is something that you'll recognise if you need to find it in the future!
Keep everything else default, meaning you will select the RSA key pair type, and the .pem file format.
As soon as you click Create key pair, your browser will download a .pem file with a name that matches your key pair. Be sure to keep this safe! You will need this if you ever want to access your instance remotely (which is the most convenient way to do so), and you will not be able to generate the file again.
I personally recommend utilising a password manager that can also handle SSH keys, such as 1password.
Network Settings
For this next step, the most important thing to worry about is our Security Group. In this case, it will determine what traffic can access our server, and from where.
First off, select Create security group, and then look to the checkboxes below. For now we only want to enable Allow SSH traffic from and Allow HTTP traffic from the internet. We will be looking at HTTPS in a later part of this guide, but for now let's not worry about it.
Next to Allow SSH traffic from you will see a dropdown, with the options of Anywhere, Custom, and My IP. This is the first part of this guide where you'll need to properly evaluate your use case, and which selection you need.
SSH, or secure shell, is a method of connecting to your instance via a shell, such as powershell, bash, or even the windows command line. As previously mentioned, this will be your most convenient way of quickly accessing the instance you create.
If you will be regularly on-the-go and always connecting from new IPs, then selecting Anywhere may be best for you. If you primarily develop from home on a static IP, then setting it to your IP is the safer option.
Whichever option you choose, this is configurable down the line should you change you mind! This decision is by no means a long term commitment.
For now, I will be choosing Anywhere for the sake of convinience.
Launch instance
And will that final step, we are done! Feel free to poke around the rest of the launch page at some of the advanced settings, however I will be keeping the rest default for now, so if you change anything there might be some unintended side effects!
Now that your instance is launched, it will go through several states in the EC2 Instances page, first it will be Pending, next the status checks will be Initializing, and after a few minutes you should have a healthy EC2 instance that is running with its checks passed!
If your instance screen has an entry that looks something like this, you'll be ready to move on to the next stage of the guide, setting up your ubuntu instance and getting Grav running!

Congratulations!
You are now set up with AWS EC2 and ready to begin diving in to your Ubuntu instance and getting your new blog set up. Move on to the next part of the guide to begin!
